
Need more space on your Virtual Disk image? I installed Windows 7 Ultimate (using my MSDN subscription) on Oracle’s Virtual Box, but didn’t guestimate the size of my virtual disk correctly. Let’s just say that 30gb is not enough if you want to install Office 2010, Visio for Enterprise Architects, and a flavor of Visual Studio.
Seeing as I kept the Virtual Disk dynamic, I theoretically should be able to increase the size of the disk from the Virtual Box console. Well, no such luck.
Here’s a summary of the steps required to achieve this:
- Create a virtual disk (as large as you want)
- Clone the old disk to the new disk (command line tool)
- Detach the old disk from the Virtual Machine (using the Virtual Box console)
- Attach the new disk to the Virtual Machine (using the Virtual Box console)
- Boot up the Virtual Machine
- Using Computer Management, extend disk space (i.e. within Windows 7)
And now for the detailed run through:
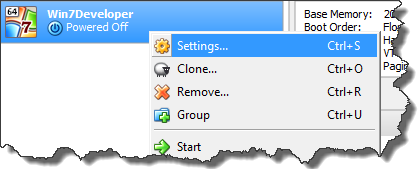
1 – Create a virtual disk via Settings.
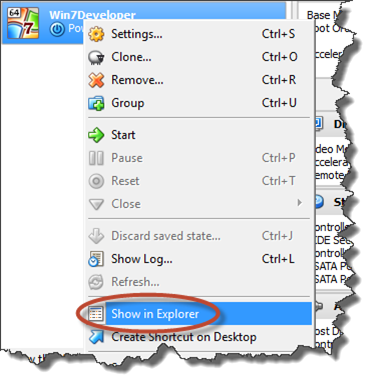
Right-click on the Virtual Machine and select Settings…:
Select Storage on the Settings dialog. Then select the Controller: SATA in the Storage Tree, and click on the Add Hard Disk icon:
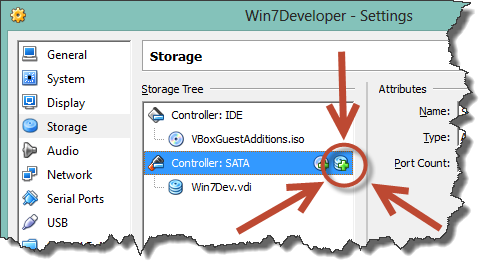
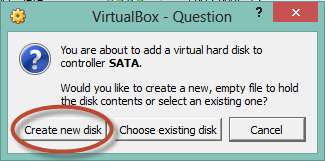
Then click on the Create new disk button:
Once the Wizard pops up;
- Select a VDI image.
- Select Dynamically allocated hard drive storage.
- Give it a name, and choose your new size to create the disk.
2 – Clone the old hard disk image into the new disk image.
You’ll need to open a command prompt, and issue the following commands.
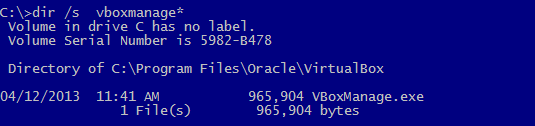
First we want to find the location of the VBoxManage.exe command:
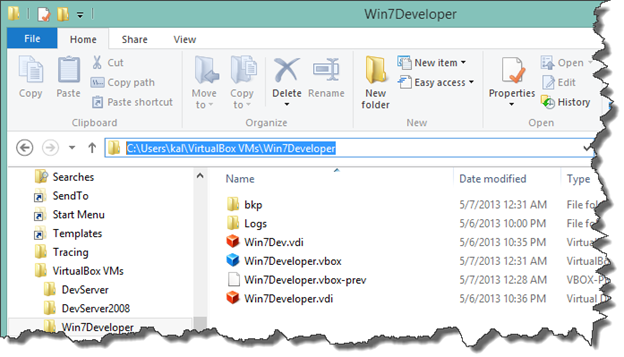
Switch to the folder that contains the disk images. You can find the location by right-clicking on the Virtual Image and selecting Show in Explorer:
Click on the address bar and CTL+C (copy) the address:
Issue the following command in the command window:
![]()
Now issue the command to clone the disk images:
![]()
Once cloning is complete (it takes a few minutes) you should get a success message:
![]()
3 – Detach the old disk from the Virtual Machine.
Open up the Virtual Box console, right-click on the Virtual Machine, select Settings, then select Storage, and right-click on the original Virtual Disk image that you want to detach and select Remove Attachment:

4 – Attach the new disk to the Virtual Machine.
Click on Controller: SATA, and click on the Add Hard Disk icon (see step 1 for image). Then select click on the Choose existing disk button.
Select the new Virtual Disk Image from the Select File dialog, and hit OK. The new Virtual Disk image will now show in the Storage Settings dialog.
5 – Boot up the Virtual Machine.
This should be pretty straightforward. If the cloning was successful you will see the Windows 7 Ultimate boot sequence and then the Login screen. Login as normal. Once logged in you may be asked to reboot – this is normal, considering we just cloned a disk. Once the VM reboots, log back in.
6 – Using Computer Management, extend the disk space.
Once logged in open File Explorer, right-click on Computer, and select Manage:

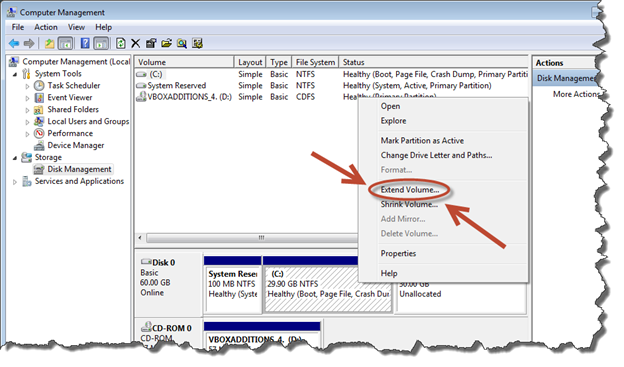
Once the Computer Management console opens up, select Disk Management under Storage. Then right-click on the C:\ drive in Disk 0 and select Extend Volume…:
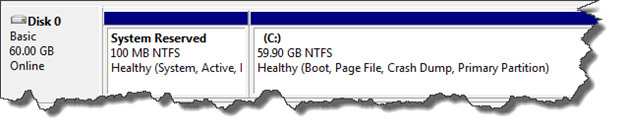
I let the wizard select all the available unallocated space, and it added it to the C:\ drive. So I finally ended up with the 60GB that I was after:
And that’s how you increase the size of your Virtual Machine’s Virtual Disk Image (vdi).
It’s not as bad as it looks, I just spelled out many of the steps. Good Luck.
